Windows 10 software updates install on your device automatically (whether you like it or not), but this guide can help you retake control and decide when to install them.
On Windows 10, you no longer have absolute control over software updates. They’re mandatory, and they download and install automatically to ensure your device stays up to date with the latest security patches and improvements. This approach is convenient for many users, but it’s not one that everyone wants.
In Windows 10 you can’t stop auto updating like the older version of Windows but you can set your network as metered Connection just follow these Steps.
Step 1:
connect your network Ethernet / Wifi that you do not want to use for windows updates
Step 2:
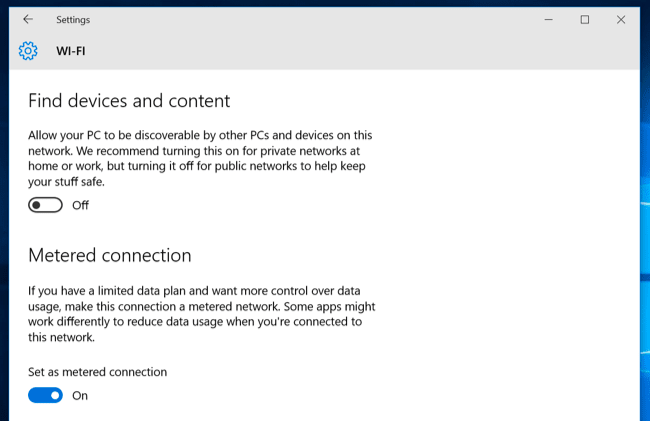
Now open the Settings app, head to Network & Internet > Wi-FI, and click “Manage Known Networks”. Choose your Wi-Fi network and click “Properties”. From there, enable the “Set as metered connection” option. This option only affects the Wi-Fi network you’re currently editing, but Windows will remember this setting for each individual Wi-Fi network on which you change it. (If you haven’t gotten the Anniversary Update yet, this option will be in Settings > Network & Internet > Advanced Options.)
Now This network is not used for windows 10 auto update
Step 3:
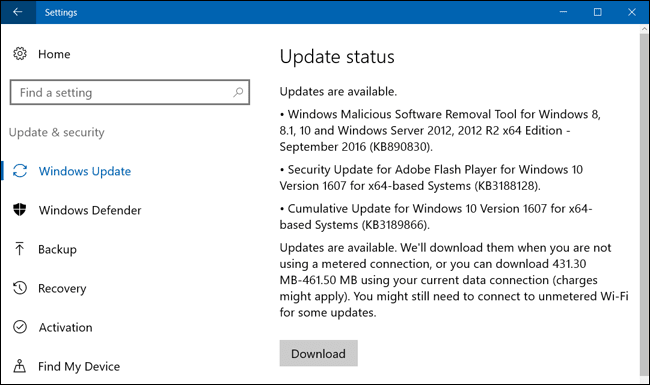
After enabling this option, Windows Update will say “Updates are available. We’ll download the updates as soon as you connect to Wi-Fi, or you can download the updates using your data connection (charges may apply.)” By marking a connection as metered, you’ve tricked Windows into thinking it’s a mobile data connection–for example, you might be tethering your PC to your smartphone. You can click the Download button to download and install updates at your leisure.
Now Stop Windows Update From Automatically Rebooting Your Computer
So maybe you don’t mind the automatic downloads, but you just don’t want Windows to restart while you’re in the middle of something. Windows 10 is okay about this since it lets you set a 12-hour window called “Active Hours” in which it won’t automatically reboot.
To set Active Hours, head to Settings > Update & Security > Windows Update. Click or tap “Change Active Hours” under Update Settings. From there, you’ll set the times you don’t want Windows to automatically restart.


